节点操作
节点关系
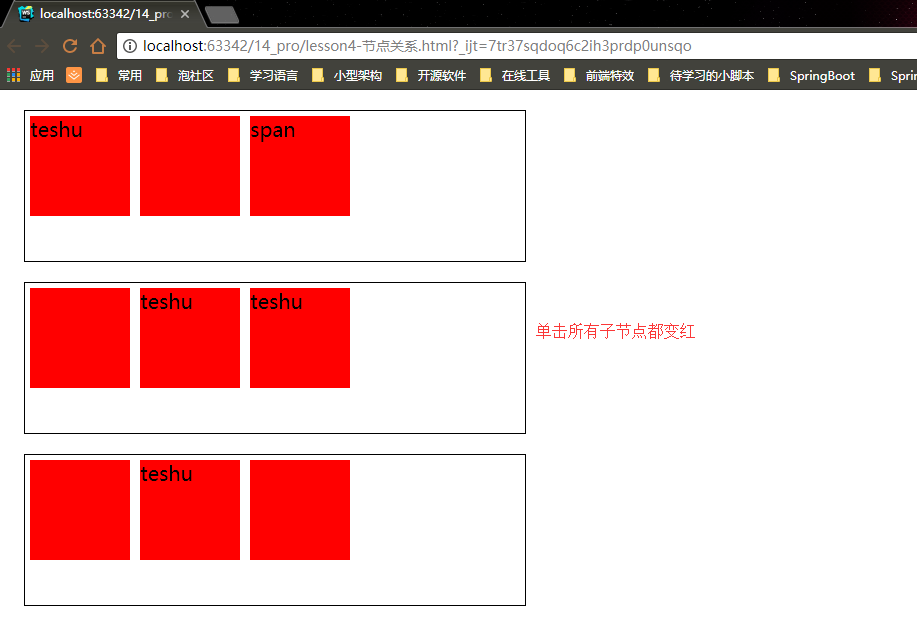
children()方法
|
|
find()方法
由于children()只能查找子元素,如果是孙子元素是找不到的。所以jQuery提供了find()”寻找”的方法。
作用:在某个节点中查找符合选择器要求的后代节点
|
|
parent()方法
作用:表示查找当前节点的直属父节点
|
|
parents()方法
作用:表示查找当前节点的所有祖先节点,直到html节点为止。
|
|
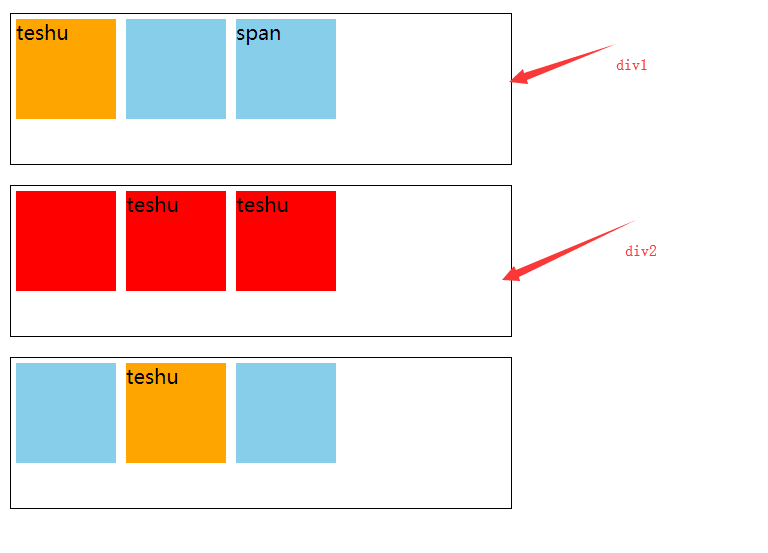
siblings()方法
作用:访问当前节点的所有兄弟节点(除本身之外)
|
|
next()、prev()、nextAll()和prevAll()方法
next() 后一个亲兄弟
prev() 前一个亲兄弟
nextAll() 后所有亲兄弟
prevAll() 前所有亲兄弟
手风琴效果例子
|
|

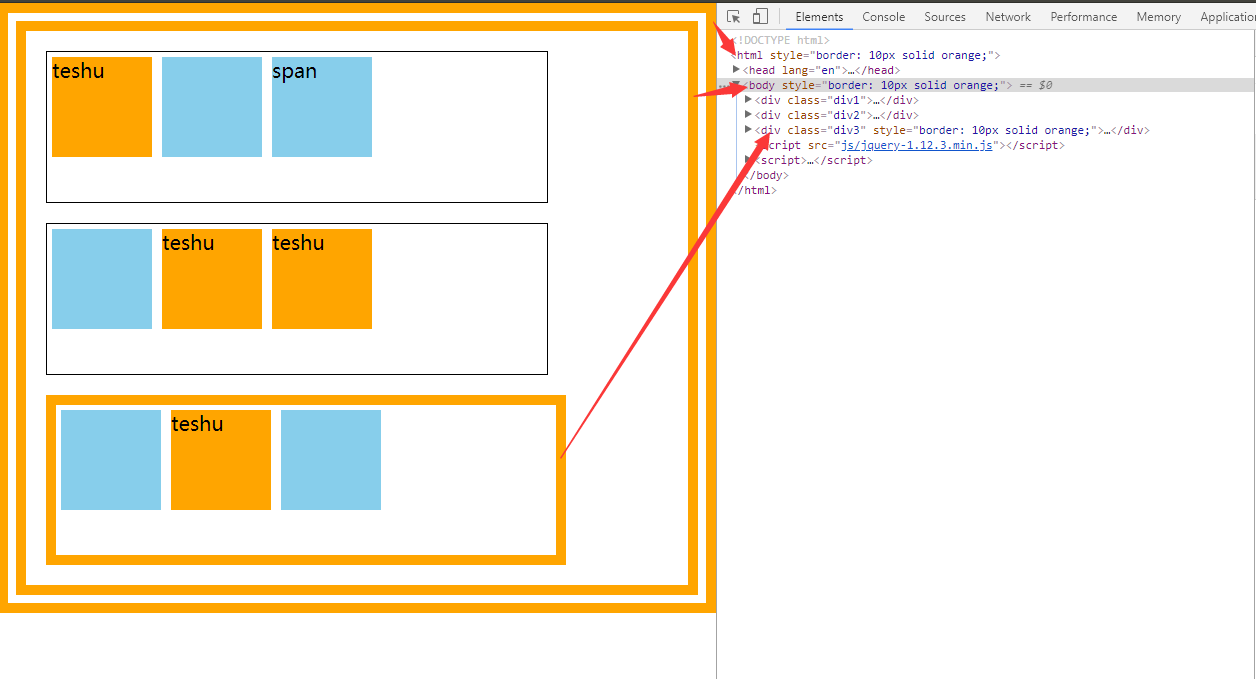
节点关系综合查找
在jQuery中可以通过连续打点来调用节点的关系方法。但是这个操作必须存在一个前提,那就是:一定要知道当前正在操作的元素是谁。
节点顺序和遍历
index()方法
index()方法用来获取当前元素在其兄弟节点中的排名,从0开始。
|
|
对应
jquery中的对应实际上指的是eq()函数,他的作用是获取集合中指定序号的节点 需要说明的一点就是序号是从0开始。
语法:$(‘selector’).eq(index)
|
|
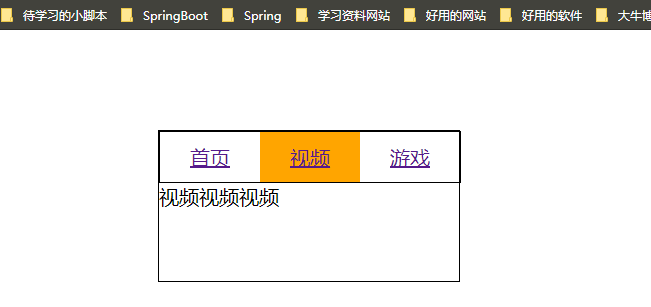
选项卡例子
|
|
each()方法
作用:遍历每个节点,然后执行里面的回调函数。
注意:回调函数中如果存在$(this),那么它指的是【遍历中当前这一次的这个节点】。
语法:$(‘selector’).each(func)
|
|
补充:delay()函数表示延迟:**
$().delay(600).animate();
$().delay(600).fadeOut();
$().delay(600).show(400); //均表示动画延迟600ms执行
360特效例子:
|
|
表格列变色例子
|
|
节点操作
内部插入append()、appendTo()、prepend()、prependTo()方法
作用:这四个方法都用来在某个节点内部插入新内容
语法:
A.append(B); //向【A节点内部现有内容之后】追加【B节点】
B.appendTo(A); //将【B节点】追加到【A节点内部现有内容之后】
A.prepend(B); //向【A节点内部现有内容之前】追加【B节点】
B.prependTo(A); //将【B节点】追加到【A节点内部的现有内容之前】
说明:四个方法所表达的含义大致相同,只不过在语法上略有出入。其中AB均为节点。
|
|
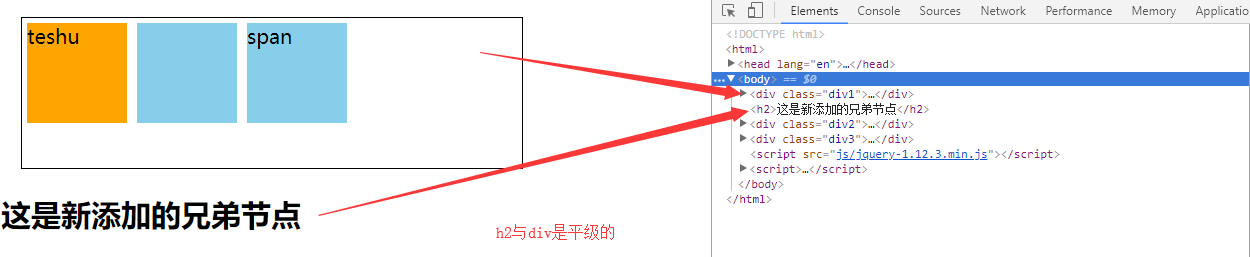
外部插入after()、before()、insertAfter()、insertBefore()
作用:相比于前面的四个方法的作用,这四个方法可以认为是给当前节点添加兄弟
语法:
A.after(B);//在【A节点之后】添加【同级节点B】
A.before(B);//在【A节点之前】添加【同级节点B】
A.insertAfter(B);//把【A节点】添加到【B节点之后】
A.insertBefore(B); //将【A节点】添加到【B节点之前】
说明:四个方法所表达的含义大致相同,只不过在语法上略有出入。其中AB均为节点。
|
|
改变节点位置
对于jq来说操作的实际上要么是节点,要么是节点组。那么有一条原则在操作节点的时候我们就必须遵守:
通过搜索获得的节点在页面中只能同一时刻出现在一个位置
这就是frank总结的‘节点守恒定律’。
|
|
特别需要说明的是,在jq中并没有提供所谓的change之类的方法。因此改变节点的位置还是需要通过append这种方法来实现。
包裹wrap()
作用:给自己增加一个父类(开发中基本没啥用)
语法:A.warp(B)
删除节点empty()、remove()
作用:empty()表示删除指定节点中的内容,而remove()则表示移除自己
语法:
A.empty() 等价于 A.html(‘’);
A.remove();
|
|
克隆clone()
作用:相当于js中的cloneNode操作,即克隆的节点在页面中没有自己的位置。需要通过append等操作才能够追加到页面当中。
语法:A.append(B.clone)
|
|
节点移动例子
|
|